Introduction:
Mealworm farming has become increasingly popular due to mealworms’ high nutritional content and versatility as feed for pets, livestock, and even human consumption. However, maintaining quality in a mealworm colony goes beyond raising them. Knowing when and how to properly harvest, clean, and store mealworms is essential for achieving the best yield and extending their freshness. This guide provides detailed, practical steps to help you make the most of your mealworm harvest.
Step 1: When to Harvest Mealworms
Mealworms should be harvested once they reach their mature larval stage but before they begin to pupate, as mature larvae are plump and nutrient-dense. Look for mealworms that are about an inch long, light brown to dark brown in color, and highly active. Harvesting them at this stage ensures optimal nutrition and quality.
Step 2: Harvesting Mealworms
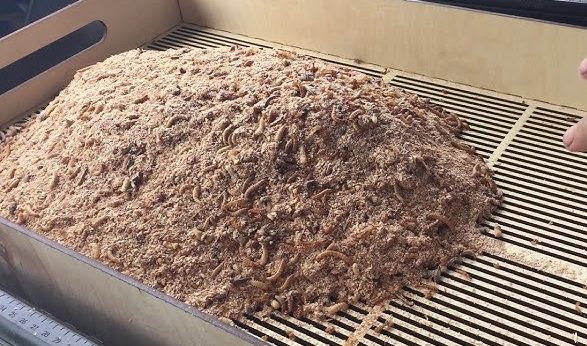
- Separate Mealworms from Bedding: Use a mesh with small enough holes to let bedding particles pass through while retaining the mealworms.
- Remove Food and Waste: Sift mealworms through the sieve to remove any food remnants and frass. This makes them cleaner and healthier for consumption or feeding purposes.
- Separate the Larvae from Other Stages: When harvesting, separate larvae from eggs, pupae, and beetles to avoid disturbing the colony’s lifecycle. A simple way is to handpick mature mealworms or use a sieve with larger holes for quicker separation.
Step 3: Cleaning Mealworms
- Rinse with Water: Place harvested mealworms in a colander and rinse under cool, running water for a few seconds. This removes any remaining bedding particles and waste.
- Quick Drying: Spread mealworms on a paper towel or cloth and pat them dry. Alternatively, place them in a well-ventilated area for air drying. Avoid leaving them damp, as moisture can lead to mold growth.
- Optional Freezing Step: For mealworms intended as feed or human consumption, freeze them after cleaning to eliminate any bacteria or pathogens. Freezing also preserves freshness if they will be stored for extended periods.
Step 4: Storing Mealworms
- Short-Term Storage: For short-term storage, place cleaned, dried mealworms in an airtight container and store them in the refrigerator. This will keep them dormant and fresh for up to two weeks.
- Long-Term Storage: For longer storage, freeze the mealworms in a sealed plastic. Frozen mealworms maintain quality and nutritional value for several months.
Conclusion:
Harvesting, cleaning, and storing mealworms properly is key to maintaining the quality and nutritional benefits of your yield. By following these steps, you can ensure a consistent, healthy supply of mealworms, whether they are for feeding animals, enriching soil, or integrating into the human food chain. Proper care at each stage of harvesting, cleaning, and storing not only enhances mealworm quality but also contributes to the long-term success of your mealworm farming operation.

